There are two methods for building snaps on Canonical-hosted servers, and both are available to every snap publisher:
-
Snapcraft remote-build The
snapcraft remote-buildcommand offloads the snap build process to the Launchpad build farm, pushing the potentially multi-architecture snap back to your machine. See Remote build for further details. -
Build from GitHub This is a build service integrated into every publisher’s Developer Account on snapcraft.io. It works by linking a snap’s GitHub repository with our Launchpad build service. See below for further details.
With Build from GitHub, a snap is rebuilt whenever a change is merged into the main branch of its respective GitHub repository. When a build successfully completes, it’s automatically released to a snap’s edge channel.
Supported build architectures are: amd64 , arm64 , armhf , i386 , ppc64el and s390x .
See Creating a snap for details on creating the metadata required to build a snap. For other ways to build a snap, see Build options.
- Prerequisites
- Link to GitHub
- Select a repository
- Monitor the build process
- Unlink and disable GitHub builds
Prerequisites
You will need a Developer account and accept that the source code for a prospective snap will be publicly accessible while on the build server. Projects also need to be hosted on a public GitHub repository.
The GitHub repository must contain at least a snapcraft.yaml file, and the snap build from a clone of the repository. The snap name needs to be registered with the Snap Store, and the same name needs to be declared in the snapcraft.yaml.
Build architectures can be defined within a snap’s snapcraft.yaml using the architectures keyword. To target all architectures, for example, use the following:
architectures:
  - build-on: s390x
  - build-on: ppc64el
  - build-on: arm64
  - build-on: armhf
  - build-on: amd64
  - build-on: i386
A snap base of core18 is assumed by default, unless specified otherwise. If a snap’s base doesn’t support a specified architecture, it will not be built. If no architecture is specified, snaps for all base-compatible architectures will attempt to be built.
Link to GitHub
To link your snap’s GitHub repository to your snap developer account, make sure you’re logged in to the developer account and go to the My snaps overview page. This is the default landing page when you log in.
Select the target snap and open its ‘Builds’ tab in the web UI. Use the GitHub login button to connect to GitHub. You will be asked to authorise read and write access for webhook creation, which is the mechanism used to trigger builds. Your GitHub account is now connected.
Select a repository
With the GitHub account connected, the next step is to choose a repository.
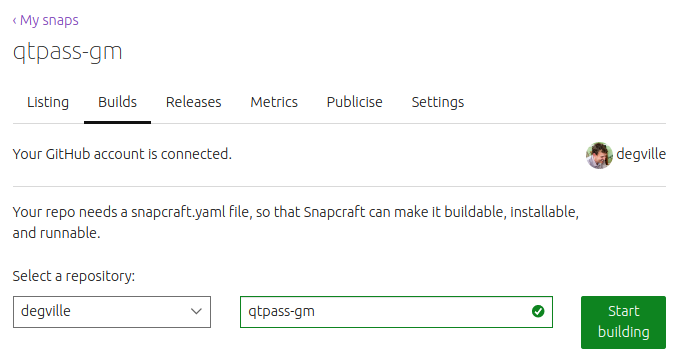
This is accomplished by using the two drop-down menus, first to choose an organisation and then to choose the repository itself. When a repository is selected it is scanned for an appropriate snapcraft.yaml configuration which, if detected, enables the Start building button:

Click on Start building to instantiate the build process and complete the linking process:

Monitor the build process
The Builds tab in the web UI will always show the build status for each supported architecture:

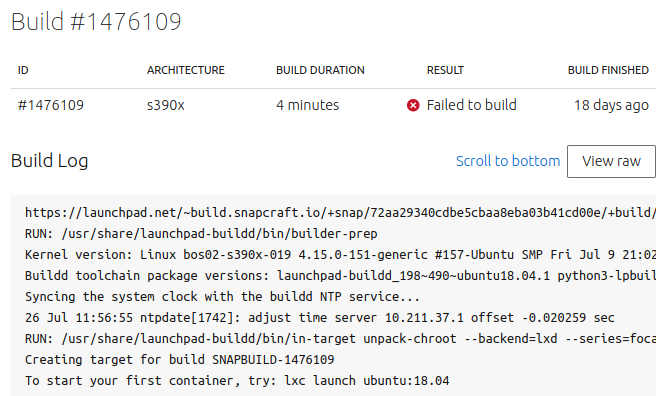
Clicking on a build ID will take you to the status page for that specific job. This is useful if a build fails as it will contain the build log for analysis:

When a build succeeds, it’s automatically released to the edge channel. The release history for those builds can be viewed from the Releases tab on the web UI by selecting Launchpad beneath the Revisions available to release heading:

See Release management for more details on how to promote and monitor release revisions and their channels.
Unlink and disable GitHub builds
To unlink your GitHub repo and disable automatic snap builds, navigate to the Builds tab in the web UI and click on Disconnect repo at the top of the page and confirm the action:

This will clear the build history on the same page, but you can still release any successful builds from the Releases page of the web UI.