Accessing Heart Rate Data for Your ResearchKit Study
In this tutorial, you’ll learn how to easily access heart rate data from HealthKit and use it in a ResearchKit study. By Matt Luedke.
Sign up/Sign in
With a free Kodeco account you can download source code, track your progress, bookmark, personalise your learner profile and more!
Create accountAlready a member of Kodeco? Sign in
Sign up/Sign in
With a free Kodeco account you can download source code, track your progress, bookmark, personalise your learner profile and more!
Create accountAlready a member of Kodeco? Sign in
Contents
Accessing Heart Rate Data for Your ResearchKit Study
30 mins
The “smart wearable” market, which includes the Apple Watch, is expected to reach worldwide sales of 53 billion US dollars in 2019. Meanwhile, studies using apps constructed with ResearchKit continue to access data from thousands of consented enrollees, turning consumers into participants and investigating some of our most important scientific mysteries.
One of these mysteries, at the intersection of wearable technology and research, is the heart. Many wearable devices can report heart rate data, providing a large dataset, and now you can tap into that dataset!
In this tutorial, you’ll learn how to easily access heart rate data from HealthKit and use it in a ResearchKit study. You’ll build an app which can:
- Access heart rate data from HealthKit.
- Create mock heart rate data for use while developing and testing the app.
- Prompt the user to walk and rest for certain amounts of time and read heart rate during those periods.
- Play a randomized song clip and read the user’s heart rate during the music.
Along the way, you’ll undoubtedly see some possibilities for customization, so building a similar app for another study will be straightforward.
Getting Started
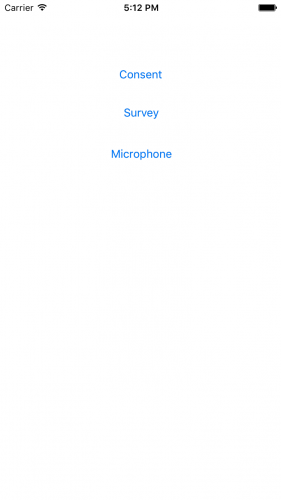
Download and unzip the starter project for this tutorial and open Karenina.xcodeproj in Xcode. Build and run, and you will see a simple main menu that looks like the following:
The project will look familiar if you’ve completed ResearchKit Tutorial with Swift: Getting Started; it’s the finished sample project from that tutorial and includes ResearchKit and several basic tasks.
The project has been renamed Karenina, and you will expand this project to include two new Active Tasks. To refresh your memory, Active Tasks are HealthKit tasks that collect data while guiding the user through some type of activity.
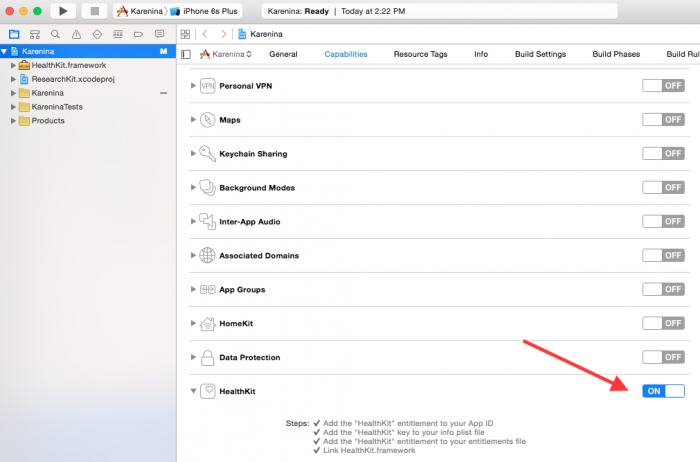
To access heart rate data, your app needs the HealthKit capability. To add this, first navigate to the General tab for the Karenina target and update the Bundle Identifier to a unique value. Next, make sure that the Team field contains your iOS Developer account.
With a valid team chosen and Bundle Identifier set, select the Capabilities tab, scroll down to HealthKit, and turn the associated switch on, as shown below:
Xcode has kindly added the HealthKit framework to your project and enabled the correct entitlement. If you run into any problems here, they are likely with the team you chose and the associated iOS Developer Account.
Creating Mock Heart Rate Data
Building your app is going to be difficult without a way to test it, and going for a walk every time you build and run would be tiring. You need a way to simulate heart rate data from HealthKit.
First, you need to gain permission to access HealthKit data. Create a new Swift file named HealthKitManager.swift and replace its contents with the following:
import Foundation
import HealthKit

class HealthKitManager: NSObject {

  static let healthKitStore = HKHealthStore()

  static func authorizeHealthKit() {

    let healthKitTypes: Set = [
      HKObjectType.quantityTypeForIdentifier(HKQuantityTypeIdentifierHeartRate)!,
      HKObjectType.quantityTypeForIdentifier(HKQuantityTypeIdentifierDistanceWalkingRunning)!
    ]

    healthKitStore.requestAuthorizationToShareTypes(healthKitTypes,
      readTypes: healthKitTypes) { _, _ in }
  }
}
After importing HealthKit, you create a HealthKitManager class with a method authorizeHealthKit() for obtaining user permission to read and write certain HealthKit quantity types. Here, the quantity types you care about are the user’s heart rate (HKQuantityTypeIdentifierHeartRate) and distance walked ( HKQuantityTypeIdentifierDistanceWalkingRunning). You create a Set with these quantity types and pass them to requestAuthorizationToShareTypes:readTypes:completion: which will present the user with a prompt.
Now you need a button to trigger the HealthKit authorization. Open ViewController.swift and add the following method to the ViewController class:
@IBAction func authorizeTapped(sender: AnyObject) {
  HealthKitManager.authorizeHealthKit()
}
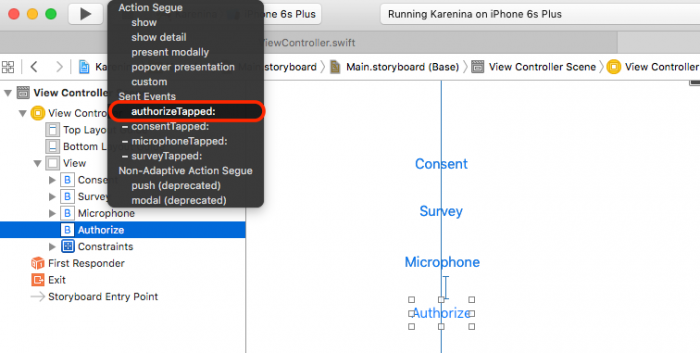
Then open Main.storyboard, add a UIButton with the title Authorize and connect it to your authorizeTapped(_:) action:
Optionally, add some Auto Layout constraints to align the button to the other buttons. If you don’t know how to do this, don’t worry as it’s not critical for this tutorial – but if you’re curious you can learn how to do so here.
Build and run your app; tap the Authorize button and you’ll see the Health Access screen, where your users can grant your app access to Health data:
Turn on all the options and tap Allow, and your ResearchKit tasks are now able to access data from HealthKit!
For testing purposes, you can verify the settings at any given time by navigating to the Settings app, then to Privacy\Health\Karenina.
For testing purposes, you can verify the settings at any given time by navigating to the Settings app, then to Privacy\Health\Karenina.
Now you’re able to create mock heart rate data and save it to HealthKit. To do that, open HealthKitManager.swift and add the following method to the class:
static func saveMockHeartData() {

  // 1. Create a heart rate BPM Sample
  let heartRateType = HKQuantityType.quantityTypeForIdentifier(HKQuantityTypeIdentifierHeartRate)!
  let heartRateQuantity = HKQuantity(unit: HKUnit(fromString: "count/min"),
    doubleValue: Double(arc4random_uniform(80) + 100))
  let heartSample = HKQuantitySample(type: heartRateType,
    quantity: heartRateQuantity, startDate: NSDate(), endDate: NSDate())

  // 2. Save the sample in the store
  healthKitStore.saveObject(heartSample, withCompletion: { (success, error) -> Void in
    if let error = error {
      print("Error saving heart sample: \(error.localizedDescription)")
    }
  })
}
Let’s review this section by section:
- In the first section of
saveMockHeartData(), you specify that your sample will be a heart rate sample. Then, you use a random measurement from 100-180 beats per minute (BPM) and set the measurement time to be the currentNSDate(). - Here you save the sample in HealthKit using
saveObject(_:withCompletion:), and print any error encountered.
Lastly, you use a timer to continuously trigger your mock data. Add the following property to the top of HealthKitManager:
static var timer: NSTimer?
Then add the following two methods to start and stop the timer:
static func startMockHeartData() {
  timer = NSTimer.scheduledTimerWithTimeInterval(1.0,
    target: self,
    selector: "saveMockHeartData",
    userInfo: nil,
    repeats: true)
}

static func stopMockHeartData() {
  self.timer?.invalidate()
}
That wraps it up for HealthKitManager! Now that you’ve authorized HealthKit and set it up to provide mock heart rate data, you can start to define ResearchKit tasks that use this data.


