Import & Export
In Zoho Invoice you have the option to import data from your computer to speed up the data collation process inside every module. You can also export data from Zoho Invoice for your reference or other purposes.
IN THIS PAGE…
- Navigate to the module you would like to import and export data.
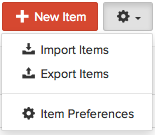
- For modules such as Items, Price Lists and Accountant, you can find the import and export option under the Settings icon drop down.

- For the Contacts module and other modules under Sales & Purchases, you can find the import and export option under Menu icon in the list view.

Importing Data
- Navigate to the module you would like to import data.
- Click on the Import option from the drop down.

- You will be directed to another page where the data you wish to be imported needs to be uploaded.
- Data can be uploaded as a CSV (Comma Separated Value) or TSV (Tab Separated Value) file from your hard drive. Also select the character encoding based on your import file and click on Next.

Insight: You have the option to download a sample file to compare it to the file you are importing to ensure that the import is quick and efficient. Click on sample file to download it to your computer.
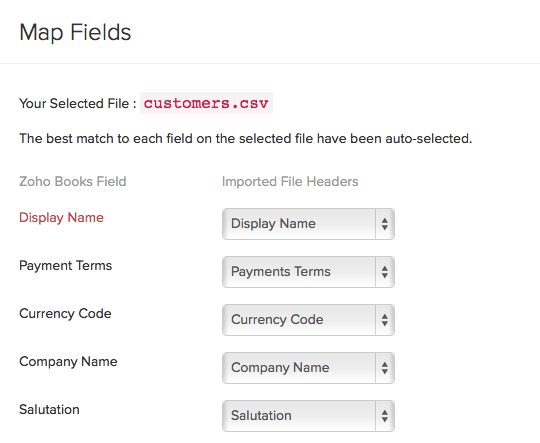
- Now you will be asked to map the fields accordingly to properly import the data, map the fields mentioned in your import file with the fields of Zoho Invoice.
- Assign the appropriate title to the fields of the import file.
- In case you wish to save this preference for future imports, click on the check box.
- Click Next to proceed further.

-
The Preview window which appears, will display a synopsis of information such as number of items that are ready to be imported, number of records skipped and unmapped fields.
-
Click Import to finish importing the file.

Exporting Data
- Navigate to the module you would like to export data.
- Click the Export option from the drop down.

- A pop-up will appear asking you to select the module from which the data needs to be exported.

- Once you have selected the module, filter the transactions you wish to export by selecting one of the following options:
- All: Export all the transactions.
- Custom: Specify a date range for which you wish to export transactions. Please note that the date range refers to the date of creation.
- Pick a format in which it needs to be exported to your hard drive, CSV or XLS.
- Click Export

Insight: The Filter by option will not be available for entities that belong to Timesheet and Others section.
