 TensorFlow.org'da görüntüleyin TensorFlow.org'da görüntüleyin |  Google Colab'da çalıştırın Google Colab'da çalıştırın |  Kaynağı GitHub'da görüntüleyin Kaynağı GitHub'da görüntüleyin |  Not defterini indir Not defterini indir |
tf.data API, basit, yeniden kullanılabilir parçalardan karmaşık girdi ardışık düzenleri oluşturmanıza olanak tanır. Örneğin, bir görüntü modeli için ardışık düzen, dağıtılmış bir dosya sistemindeki dosyalardan veri toplayabilir, her görüntüye rastgele bozulmalar uygulayabilir ve rastgele seçilen görüntüleri eğitim için bir toplu iş halinde birleştirebilir. Bir metin modelinin ardışık düzeni, ham metin verilerinden sembollerin çıkarılmasını, bunları bir arama tablosuyla gömme tanımlayıcılara dönüştürmeyi ve farklı uzunluklardaki dizileri bir araya toplamayı içerebilir. tf.data API, büyük miktarda veriyi işlemeyi, farklı veri formatlarından okumayı ve karmaşık dönüşümler gerçekleştirmeyi mümkün kılar.
tf.data API'si, her öğenin bir veya daha fazla bileşenden oluştuğu bir dizi öğeyi temsil eden bir tf.data.Dataset soyutlaması sunar. Örneğin, bir görüntü ardışık düzeninde, bir öğe, görüntüyü ve etiketini temsil eden bir çift tensör bileşeniyle tek bir eğitim örneği olabilir.
Veri kümesi oluşturmanın iki farklı yolu vardır:
Bir veri kaynağı , bellekte veya bir veya daha fazla dosyada depolanan verilerden bir
Datasetoluşturur.Bir veri dönüştürme , bir veya daha fazla
tf.data.Datasetnesnesinden bir veri kümesi oluşturur.
import tensorflow as tf
import pathlib
import os
import matplotlib.pyplot as plt
import pandas as pd
import numpy as np

np.set_printoptions(precision=4)
temel mekanik
Bir girdi ardışık düzeni oluşturmak için bir veri kaynağıyla başlamalısınız. Örneğin, bellekteki verilerden bir Dataset oluşturmak için tf.data.Dataset.from_tensors() veya tf.data.Dataset.from_tensor_slices() kullanabilirsiniz. Alternatif olarak, girdi verileriniz önerilen TFRecord biçiminde bir dosyada saklanıyorsa, tf.data.TFRecordDataset() kullanabilirsiniz.
Bir Dataset nesnesine sahip olduğunuzda, tf.data.Dataset nesnesinde yöntem çağrılarını zincirleyerek onu yeni bir Dataset dönüştürebilirsiniz . Örneğin, Dataset.map() gibi eleman başına dönüşümleri ve Dataset.map() gibi çok elemanlı dönüşümleri Dataset.batch() . Dönüşümlerin tam listesi için tf.data.Dataset belgelerine bakın.
Dataset nesnesi yinelenebilir bir Python'dur. Bu, öğelerini bir for döngüsü kullanarak tüketmeyi mümkün kılar:
dataset = tf.data.Dataset.from_tensor_slices([8, 3, 0, 8, 2, 1])
dataset
<TensorSliceDataset element_spec=TensorSpec(shape=(), dtype=tf.int32, name=None)>yer tutucu4 l10n-yer
for elem in dataset:
  print(elem.numpy())
8
3
0
8
2
1
Veya iter kullanarak açıkça bir Python yineleyici oluşturarak ve next öğesini kullanarak öğelerini tüketerek:
it = iter(dataset)

print(next(it).numpy())
8
Alternatif olarak, veri kümesi öğeleri, tüm öğeleri tek bir sonuç üretecek şekilde azaltan reduce dönüşümü kullanılarak tüketilebilir. Aşağıdaki örnek, bir tamsayı veri kümesinin toplamını hesaplamak için reduce dönüşümünün nasıl kullanılacağını gösterir.
print(dataset.reduce(0, lambda state, value: state + value).numpy())
22
Veri kümesi yapısı
Bir veri kümesi, her öğenin bileşenlerin aynı (iç içe geçmiş) yapısı olduğu bir dizi öğe üretir. Yapının bağımsız bileşenleri, tf.Tensor , tf.sparse.SparseTensor , tf.RaggedTensor , tf.TensorArray veya tf.data.Dataset dahil olmak üzere, tf.TypeSpec tarafından temsil edilebilen herhangi bir türde olabilir.
Öğelerin (iç içe) yapısını ifade etmek için kullanılabilecek Python yapıları arasında tuple , dict , NamedTuple ve OrderedDict . Özellikle list , veri kümesi öğelerinin yapısını ifade etmek için geçerli bir yapı değildir. Bunun nedeni, ilk tf.data kullanıcılarının, list girdilerinin (örneğin tf.data.Dataset.from_tensors ) otomatik olarak tensörler olarak paketlenmesi ve list çıktılarının (örneğin, kullanıcı tanımlı işlevlerin dönüş değerleri) bir tuple zorlanması konusunda güçlü hissetmeleridir. Sonuç olarak, bir list girdisinin bir yapı olarak ele alınmasını istiyorsanız, onu tuple dönüştürmeniz ve bir list çıktısının tek bir bileşen olmasını istiyorsanız, onu tf.stack kullanarak açıkça paketlemeniz gerekir. .
Dataset.element_spec özelliği, her bir öğe bileşeninin türünü incelemenize olanak tanır. Özellik, tek bir bileşen, bir bileşen demeti veya iç içe geçmiş bir bileşen demeti olabilen öğenin yapısıyla eşleşen tf.TypeSpec nesnelerinin iç içe geçmiş bir yapısını döndürür. Örneğin:
dataset1 = tf.data.Dataset.from_tensor_slices(tf.random.uniform([4, 10]))

dataset1.element_spec
TensorSpec(shape=(10,), dtype=tf.float32, name=None)
dataset2 = tf.data.Dataset.from_tensor_slices(
   (tf.random.uniform([4]),
    tf.random.uniform([4, 100], maxval=100, dtype=tf.int32)))

dataset2.element_spec
(TensorSpec(shape=(), dtype=tf.float32, name=None),
 TensorSpec(shape=(100,), dtype=tf.int32, name=None))
dataset3 = tf.data.Dataset.zip((dataset1, dataset2))

dataset3.element_spec
(TensorSpec(shape=(10,), dtype=tf.float32, name=None),
 (TensorSpec(shape=(), dtype=tf.float32, name=None),
  TensorSpec(shape=(100,), dtype=tf.int32, name=None)))
# Dataset containing a sparse tensor.
dataset4 = tf.data.Dataset.from_tensors(tf.SparseTensor(indices=[[0, 0], [1, 2]], values=[1, 2], dense_shape=[3, 4]))

dataset4.element_spec
SparseTensorSpec(TensorShape([3, 4]), tf.int32)
# Use value_type to see the type of value represented by the element spec
dataset4.element_spec.value_type
tensorflow.python.framework.sparse_tensor.SparseTensor
Dataset kümesi dönüşümleri, herhangi bir yapının veri kümelerini destekler. Her öğeye bir işlev uygulayan Dataset.map( Dataset.map() ve Dataset.filter() dönüşümlerini kullanırken, öğe yapısı işlevin bağımsız değişkenlerini belirler:
dataset1 = tf.data.Dataset.from_tensor_slices(
    tf.random.uniform([4, 10], minval=1, maxval=10, dtype=tf.int32))

dataset1
<TensorSliceDataset element_spec=TensorSpec(shape=(10,), dtype=tf.int32, name=None)>
for z in dataset1:
  print(z.numpy())
[3 3 7 5 9 8 4 2 3 7]
[8 9 6 7 5 6 1 6 2 3]
[9 8 4 4 8 7 1 5 6 7]
[5 9 5 4 2 5 7 8 8 8]
dataset2 = tf.data.Dataset.from_tensor_slices(
   (tf.random.uniform([4]),
    tf.random.uniform([4, 100], maxval=100, dtype=tf.int32)))

dataset2
<TensorSliceDataset element_spec=(TensorSpec(shape=(), dtype=tf.float32, name=None), TensorSpec(shape=(100,), dtype=tf.int32, name=None))>
dataset3 = tf.data.Dataset.zip((dataset1, dataset2))

dataset3
<ZipDataset element_spec=(TensorSpec(shape=(10,), dtype=tf.int32, name=None), (TensorSpec(shape=(), dtype=tf.float32, name=None), TensorSpec(shape=(100,), dtype=tf.int32, name=None)))>
for a, (b,c) in dataset3:
  print('shapes: {a.shape}, {b.shape}, {c.shape}'.format(a=a, b=b, c=c))
shapes: (10,), (), (100,)
shapes: (10,), (), (100,)
shapes: (10,), (), (100,)
shapes: (10,), (), (100,)
Giriş verilerini okuma
NumPy dizilerini tüketme
Daha fazla örnek için NumPy dizilerini yükleme konusuna bakın.
Tüm girdi verileriniz belleğe sığıyorsa, bunlardan bir Dataset oluşturmanın en basit yolu onları tf.Tensor nesnelerine dönüştürmek ve Dataset.from_tensor_slices() kullanmaktır.
train, test = tf.keras.datasets.fashion_mnist.load_data()
Downloading data from https://storage.googleapis.com/tensorflow/tf-keras-datasets/train-labels-idx1-ubyte.gz
32768/29515 [=================================] - 0s 0us/step
40960/29515 [=========================================] - 0s 0us/step
Downloading data from https://storage.googleapis.com/tensorflow/tf-keras-datasets/train-images-idx3-ubyte.gz
26427392/26421880 [==============================] - 0s 0us/step
26435584/26421880 [==============================] - 0s 0us/step
Downloading data from https://storage.googleapis.com/tensorflow/tf-keras-datasets/t10k-labels-idx1-ubyte.gz
16384/5148 [===============================================================================================] - 0s 0us/step
Downloading data from https://storage.googleapis.com/tensorflow/tf-keras-datasets/t10k-images-idx3-ubyte.gz
4423680/4422102 [==============================] - 0s 0us/step
4431872/4422102 [==============================] - 0s 0us/step
yer tutucu32 l10n-yer
images, labels = train
images = images/255

dataset = tf.data.Dataset.from_tensor_slices((images, labels))
dataset
<TensorSliceDataset element_spec=(TensorSpec(shape=(28, 28), dtype=tf.float64, name=None), TensorSpec(shape=(), dtype=tf.uint8, name=None))>
Python jeneratörlerini tüketme
Bir tf.data.Dataset olarak kolayca alınabilen diğer bir yaygın veri kaynağı python oluşturucudur.
def count(stop):
  i = 0
  while i<stop:
    yield i
    i += 1
for n in count(5):
  print(n)
0
1
2
3
4
Dataset.from_generator yapıcısı, python üretecini tamamen işlevsel bir tf.data.Dataset .
Yapıcı, bir yineleyici değil, bir çağrılabilir girdi olarak alır. Bu, sona ulaştığında jeneratörü yeniden başlatmasını sağlar. args argümanları olarak geçirilen isteğe bağlı bir argüman argümanı alır.
tf.Graph dahili olarak bir tf.data oluşturduğu ve grafik kenarları bir tf.dtype gerektirdiği için output_types bağımsız değişkeni gereklidir.
ds_counter = tf.data.Dataset.from_generator(count, args=[25], output_types=tf.int32, output_shapes = (), )
for count_batch in ds_counter.repeat().batch(10).take(10):
  print(count_batch.numpy())
[0 1 2 3 4 5 6 7 8 9]
[10 11 12 13 14 15 16 17 18 19]
[20 21 22 23 24  0  1  2  3  4]
[ 5  6  7  8  9 10 11 12 13 14]
[15 16 17 18 19 20 21 22 23 24]
[0 1 2 3 4 5 6 7 8 9]
[10 11 12 13 14 15 16 17 18 19]
[20 21 22 23 24  0  1  2  3  4]
[ 5  6  7  8  9 10 11 12 13 14]
[15 16 17 18 19 20 21 22 23 24]
output_shapes bağımsız değişkeni gerekli değildir, ancak birçok TensorFlow işlemi bilinmeyen bir sıraya sahip tensörleri desteklemediğinden şiddetle tavsiye edilir. Belirli bir eksenin uzunluğu bilinmiyorsa veya değişkense, bunu output_shapes içinde None olarak ayarlayın.
Ayrıca output_shapes ve output_types öğelerinin diğer veri kümesi yöntemleriyle aynı yuvalama kurallarını izlediğini belirtmek de önemlidir.
İşte her iki yönü de gösteren bir örnek oluşturucu, ikinci dizinin bilinmeyen uzunlukta bir vektör olduğu dizilerin demetlerini döndürür.
def gen_series():
  i = 0
  while True:
    size = np.random.randint(0, 10)
    yield i, np.random.normal(size=(size,))
    i += 1
for i, series in gen_series():
  print(i, ":", str(series))
  if i > 5:
    break
0 : [0.3939]
1 : [ 0.9282 -0.0158  1.0096  0.7155  0.0491  0.6697 -0.2565  0.487 ]
2 : [-0.4831  0.37   -1.3918 -0.4786  0.7425 -0.3299]
3 : [ 0.1427 -1.0438  0.821  -0.8766 -0.8369  0.4168]
4 : [-1.4984 -1.8424  0.0337  0.0941  1.3286 -1.4938]
5 : [-1.3158 -1.2102  2.6887 -1.2809]
6 : []
İlk çıktı bir int32 , ikincisi bir float32 .
İlk öğe bir skalerdir, şekil () , ikincisi ise uzunluğu, şekli bilinmeyen bir vektördür (None,)
ds_series = tf.data.Dataset.from_generator(
    gen_series,
    output_types=(tf.int32, tf.float32),
    output_shapes=((), (None,)))

ds_series
<FlatMapDataset element_spec=(TensorSpec(shape=(), dtype=tf.int32, name=None), TensorSpec(shape=(None,), dtype=tf.float32, name=None))>
Artık normal bir tf.data.Dataset gibi kullanılabilir. Değişken şekle sahip bir veri kümesini Dataset.padded_batch kullanmanız gerektiğini unutmayın.
ds_series_batch = ds_series.shuffle(20).padded_batch(10)

ids, sequence_batch = next(iter(ds_series_batch))
print(ids.numpy())
print()
print(sequence_batch.numpy())
[ 8 10 18  1  5 19 22 17 21 25]

[[-0.6098  0.1366 -2.15   -0.9329  0.      0.    ]
 [ 1.0295 -0.033  -0.0388  0.      0.      0.    ]
 [-0.1137  0.3552  0.4363 -0.2487 -1.1329  0.    ]
 [ 0.      0.      0.      0.      0.      0.    ]
 [-1.0466  0.624  -1.7705  1.4214  0.9143 -0.62  ]
 [-0.9502  1.7256  0.5895  0.7237  1.5397  0.    ]
 [ 0.3747  1.2967  0.      0.      0.      0.    ]
 [-0.4839  0.292  -0.7909 -0.7535  0.4591 -1.3952]
 [-0.0468  0.0039 -1.1185 -1.294   0.      0.    ]
 [-0.1679 -0.3375  0.      0.      0.      0.    ]]
Daha gerçekçi bir örnek için, preprocessing.image.ImageDataGenerator tf.data.Dataset olarak sarmayı deneyin.
İlk önce verileri indirin:
flowers = tf.keras.utils.get_file(
    'flower_photos',
    'https://storage.googleapis.com/download.tensorflow.org/example_images/flower_photos.tgz',
    untar=True)
Downloading data from https://storage.googleapis.com/download.tensorflow.org/example_images/flower_photos.tgz
228818944/228813984 [==============================] - 10s 0us/step
228827136/228813984 [==============================] - 10s 0us/step
image.ImageDataGenerator oluşturun
img_gen = tf.keras.preprocessing.image.ImageDataGenerator(rescale=1./255, rotation_range=20)
images, labels = next(img_gen.flow_from_directory(flowers))
Found 3670 images belonging to 5 classes.
print(images.dtype, images.shape)
print(labels.dtype, labels.shape)
float32 (32, 256, 256, 3)
float32 (32, 5)
ds = tf.data.Dataset.from_generator(
    lambda: img_gen.flow_from_directory(flowers),
    output_types=(tf.float32, tf.float32),
    output_shapes=([32,256,256,3], [32,5])
)

ds.element_spec
(TensorSpec(shape=(32, 256, 256, 3), dtype=tf.float32, name=None),
 TensorSpec(shape=(32, 5), dtype=tf.float32, name=None))
for images, label in ds.take(1):
  print('images.shape: ', images.shape)
  print('labels.shape: ', labels.shape)
Found 3670 images belonging to 5 classes.
images.shape:  (32, 256, 256, 3)
labels.shape:  (32, 5)
TFRecord verilerini tüketme
Uçtan uca bir örnek için TFRecords Yükleme konusuna bakın.
tf.data API, belleğe sığmayan büyük veri kümelerini işleyebilmeniz için çeşitli dosya biçimlerini destekler. Örneğin, TFRecord dosya formatı, birçok TensorFlow uygulamasının eğitim verileri için kullandığı, kayıt odaklı basit bir ikili formattır. tf.data.TFRecordDataset sınıfı, bir giriş hattının parçası olarak bir veya daha fazla TFRecord dosyasının içeriği üzerinden akış yapmanızı sağlar.
İşte Fransız Sokak Adı İşaretlerinden (FSNS) alınan test dosyasını kullanan bir örnek.
# Creates a dataset that reads all of the examples from two files.
fsns_test_file = tf.keras.utils.get_file("fsns.tfrec", "https://storage.googleapis.com/download.tensorflow.org/data/fsns-20160927/testdata/fsns-00000-of-00001")
Downloading data from https://storage.googleapis.com/download.tensorflow.org/data/fsns-20160927/testdata/fsns-00000-of-00001
7905280/7904079 [==============================] - 1s 0us/step
7913472/7904079 [==============================] - 1s 0us/step
TFRecordDataset başlatıcısının filenames bağımsız değişkeni bir dize, bir dize listesi veya bir tf.Tensor dizesi olabilir. Bu nedenle, eğitim ve doğrulama amacıyla iki dosya grubunuz varsa, dosya adlarını girdi bağımsız değişkeni olarak alarak veri kümesini üreten bir fabrika yöntemi oluşturabilirsiniz:
dataset = tf.data.TFRecordDataset(filenames = [fsns_test_file])
dataset
<TFRecordDatasetV2 element_spec=TensorSpec(shape=(), dtype=tf.string, name=None)>
Birçok TensorFlow projesi, TFRecord dosyalarında serileştirilmiş tf.train.Example kayıtları kullanır. Bunların denetlenebilmeleri için kodlarının çözülmesi gerekir:
raw_example = next(iter(dataset))
parsed = tf.train.Example.FromString(raw_example.numpy())

parsed.features.feature['image/text']
bytes_list {
  value: "Rue Perreyon"
}
Metin verilerini tüketme
Uçtan uca bir örnek için Metin Yükleme konusuna bakın.
Birçok veri seti, bir veya daha fazla metin dosyası olarak dağıtılır. tf.data.TextLineDataset , bir veya daha fazla metin dosyasından satırları ayıklamak için kolay bir yol sağlar. Bir veya daha fazla dosya adı verildiğinde, bir TextLineDataset , bu dosyaların satırı başına bir dize değerli öğe üretecektir.
directory_url = 'https://storage.googleapis.com/download.tensorflow.org/data/illiad/'
file_names = ['cowper.txt', 'derby.txt', 'butler.txt']

file_paths = [
    tf.keras.utils.get_file(file_name, directory_url + file_name)
    for file_name in file_names
]
Downloading data from https://storage.googleapis.com/download.tensorflow.org/data/illiad/cowper.txt
819200/815980 [==============================] - 0s 0us/step
827392/815980 [==============================] - 0s 0us/step
Downloading data from https://storage.googleapis.com/download.tensorflow.org/data/illiad/derby.txt
811008/809730 [==============================] - 0s 0us/step
819200/809730 [==============================] - 0s 0us/step
Downloading data from https://storage.googleapis.com/download.tensorflow.org/data/illiad/butler.txt
811008/807992 [==============================] - 0s 0us/step
819200/807992 [==============================] - 0s 0us/step
-yer tutucu66 l10n-yer
dataset = tf.data.TextLineDataset(file_paths)
İşte ilk dosyanın ilk birkaç satırı:
for line in dataset.take(5):
  print(line.numpy())
b"\xef\xbb\xbfAchilles sing, O Goddess! Peleus' son;"
b'His wrath pernicious, who ten thousand woes'
b"Caused to Achaia's host, sent many a soul"
b'Illustrious into Ades premature,'
b'And Heroes gave (so stood the will of Jove)'
Dosyalar arasında satır değiştirmek için Dataset.interleave kullanın. Bu, dosyaları birlikte karıştırmayı kolaylaştırır. İşte her çeviriden birinci, ikinci ve üçüncü satırlar:
files_ds = tf.data.Dataset.from_tensor_slices(file_paths)
lines_ds = files_ds.interleave(tf.data.TextLineDataset, cycle_length=3)

for i, line in enumerate(lines_ds.take(9)):
  if i % 3 == 0:
    print()
  print(line.numpy())
b"\xef\xbb\xbfAchilles sing, O Goddess! Peleus' son;"
b"\xef\xbb\xbfOf Peleus' son, Achilles, sing, O Muse,"
b'\xef\xbb\xbfSing, O goddess, the anger of Achilles son of Peleus, that brought'

b'His wrath pernicious, who ten thousand woes'
b'The vengeance, deep and deadly; whence to Greece'
b'countless ills upon the Achaeans. Many a brave soul did it send'

b"Caused to Achaia's host, sent many a soul"
b'Unnumbered ills arose; which many a soul'
b'hurrying down to Hades, and many a hero did it yield a prey to dogs and'
Varsayılan olarak, bir TextLineDataset , örneğin dosya bir başlık satırıyla başlıyorsa veya yorumlar içeriyorsa, istenmeyebilecek her dosyanın her satırını verir. Bu satırlar, Dataset.skip() veya Dataset.filter() dönüşümleri kullanılarak kaldırılabilir. Burada, ilk satırı atlar, ardından yalnızca hayatta kalanları bulmak için filtrelersiniz.
titanic_file = tf.keras.utils.get_file("train.csv", "https://storage.googleapis.com/tf-datasets/titanic/train.csv")
titanic_lines = tf.data.TextLineDataset(titanic_file)
Downloading data from https://storage.googleapis.com/tf-datasets/titanic/train.csv
32768/30874 [===============================] - 0s 0us/step
40960/30874 [=======================================] - 0s 0us/step
for line in titanic_lines.take(10):
  print(line.numpy())
b'survived,sex,age,n_siblings_spouses,parch,fare,class,deck,embark_town,alone'
b'0,male,22.0,1,0,7.25,Third,unknown,Southampton,n'
b'1,female,38.0,1,0,71.2833,First,C,Cherbourg,n'
b'1,female,26.0,0,0,7.925,Third,unknown,Southampton,y'
b'1,female,35.0,1,0,53.1,First,C,Southampton,n'
b'0,male,28.0,0,0,8.4583,Third,unknown,Queenstown,y'
b'0,male,2.0,3,1,21.075,Third,unknown,Southampton,n'
b'1,female,27.0,0,2,11.1333,Third,unknown,Southampton,n'
b'1,female,14.0,1,0,30.0708,Second,unknown,Cherbourg,n'
b'1,female,4.0,1,1,16.7,Third,G,Southampton,n'
def survived(line):
  return tf.not_equal(tf.strings.substr(line, 0, 1), "0")

survivors = titanic_lines.skip(1).filter(survived)
for line in survivors.take(10):
  print(line.numpy())
b'1,female,38.0,1,0,71.2833,First,C,Cherbourg,n'
b'1,female,26.0,0,0,7.925,Third,unknown,Southampton,y'
b'1,female,35.0,1,0,53.1,First,C,Southampton,n'
b'1,female,27.0,0,2,11.1333,Third,unknown,Southampton,n'
b'1,female,14.0,1,0,30.0708,Second,unknown,Cherbourg,n'
b'1,female,4.0,1,1,16.7,Third,G,Southampton,n'
b'1,male,28.0,0,0,13.0,Second,unknown,Southampton,y'
b'1,female,28.0,0,0,7.225,Third,unknown,Cherbourg,y'
b'1,male,28.0,0,0,35.5,First,A,Southampton,y'
b'1,female,38.0,1,5,31.3875,Third,unknown,Southampton,n'
CSV verilerini tüketme
Daha fazla örnek için bkz. CSV Dosyalarını Yükleme ve Panda DataFrame'lerini Yükleme .
CSV dosya formatı, tablo verilerini düz metin olarak depolamak için popüler bir formattır.
Örneğin:
titanic_file = tf.keras.utils.get_file("train.csv", "https://storage.googleapis.com/tf-datasets/titanic/train.csv")
df = pd.read_csv(titanic_file)
df.head()
Verileriniz belleğe sığarsa, aynı Dataset.from_tensor_slices yöntemi sözlüklerde çalışır ve bu verilerin kolayca içe aktarılmasını sağlar:
titanic_slices = tf.data.Dataset.from_tensor_slices(dict(df))

for feature_batch in titanic_slices.take(1):
  for key, value in feature_batch.items():
    print("  {!r:20s}: {}".format(key, value))
'survived'          : 0
  'sex'               : b'male'
  'age'               : 22.0
  'n_siblings_spouses': 1
  'parch'             : 0
  'fare'              : 7.25
  'class'             : b'Third'
  'deck'              : b'unknown'
  'embark_town'       : b'Southampton'
  'alone'             : b'n'
Daha ölçeklenebilir bir yaklaşım, gerektiğinde diskten yüklemektir.
tf.data modülü, RFC 4180 ile uyumlu bir veya daha fazla CSV dosyasından kayıt çıkarmak için yöntemler sağlar.
experimental.make_csv_dataset işlevi, csv dosyası kümelerini okumak için üst düzey arabirimdir. Kullanımı basitleştirmek için sütun türü çıkarımını ve toplu işleme ve karıştırma gibi diğer birçok özelliği destekler.
titanic_batches = tf.data.experimental.make_csv_dataset(
    titanic_file, batch_size=4,
    label_name="survived")
for feature_batch, label_batch in titanic_batches.take(1):
  print("'survived': {}".format(label_batch))
  print("features:")
  for key, value in feature_batch.items():
    print("  {!r:20s}: {}".format(key, value))
'survived': [1 0 0 0]
features:
  'sex'               : [b'female' b'female' b'male' b'male']
  'age'               : [32. 28. 37. 50.]
  'n_siblings_spouses': [0 3 0 0]
  'parch'             : [0 1 1 0]
  'fare'              : [13.     25.4667 29.7    13.    ]
  'class'             : [b'Second' b'Third' b'First' b'Second']
  'deck'              : [b'unknown' b'unknown' b'C' b'unknown']
  'embark_town'       : [b'Southampton' b'Southampton' b'Cherbourg' b'Southampton']
  'alone'             : [b'y' b'n' b'n' b'y']
Yalnızca bir sütun alt kümesine ihtiyacınız varsa, select_columns bağımsız değişkenini kullanabilirsiniz.
titanic_batches = tf.data.experimental.make_csv_dataset(
    titanic_file, batch_size=4,
    label_name="survived", select_columns=['class', 'fare', 'survived'])
for feature_batch, label_batch in titanic_batches.take(1):
  print("'survived': {}".format(label_batch))
  for key, value in feature_batch.items():
    print("  {!r:20s}: {}".format(key, value))
'survived': [0 1 1 0]
  'fare'              : [ 7.05 15.5  26.25  8.05]
  'class'             : [b'Third' b'Third' b'Second' b'Third']
Daha ince taneli kontrol sağlayan daha düşük seviyeli bir experimental.CsvDataset sınıfı da vardır. Sütun türü çıkarımını desteklemez. Bunun yerine her sütunun türünü belirtmelisiniz.
titanic_types  = [tf.int32, tf.string, tf.float32, tf.int32, tf.int32, tf.float32, tf.string, tf.string, tf.string, tf.string]
dataset = tf.data.experimental.CsvDataset(titanic_file, titanic_types , header=True)

for line in dataset.take(10):
  print([item.numpy() for item in line])
[0, b'male', 22.0, 1, 0, 7.25, b'Third', b'unknown', b'Southampton', b'n']
[1, b'female', 38.0, 1, 0, 71.2833, b'First', b'C', b'Cherbourg', b'n']
[1, b'female', 26.0, 0, 0, 7.925, b'Third', b'unknown', b'Southampton', b'y']
[1, b'female', 35.0, 1, 0, 53.1, b'First', b'C', b'Southampton', b'n']
[0, b'male', 28.0, 0, 0, 8.4583, b'Third', b'unknown', b'Queenstown', b'y']
[0, b'male', 2.0, 3, 1, 21.075, b'Third', b'unknown', b'Southampton', b'n']
[1, b'female', 27.0, 0, 2, 11.1333, b'Third', b'unknown', b'Southampton', b'n']
[1, b'female', 14.0, 1, 0, 30.0708, b'Second', b'unknown', b'Cherbourg', b'n']
[1, b'female', 4.0, 1, 1, 16.7, b'Third', b'G', b'Southampton', b'n']
[0, b'male', 20.0, 0, 0, 8.05, b'Third', b'unknown', b'Southampton', b'y']
Bazı sütunlar boşsa, bu düşük düzeyli arabirim, sütun türleri yerine varsayılan değerler sağlamanıza olanak tanır.
%%writefile missing.csv
1,2,3,4
,2,3,4
1,,3,4
1,2,,4
1,2,3,
,,,
Writing missing.csv
# Creates a dataset that reads all of the records from two CSV files, each with
# four float columns which may have missing values.

record_defaults = [999,999,999,999]
dataset = tf.data.experimental.CsvDataset("missing.csv", record_defaults)
dataset = dataset.map(lambda *items: tf.stack(items))
dataset
<MapDataset element_spec=TensorSpec(shape=(4,), dtype=tf.int32, name=None)>
for line in dataset:
  print(line.numpy())
[1 2 3 4]
[999   2   3   4]
[  1 999   3   4]
[  1   2 999   4]
[  1   2   3 999]
[999 999 999 999]
Varsayılan olarak, bir CsvDataset , dosyanın her satırının her sütununu verir; bu, örneğin dosyanın göz ardı edilmesi gereken bir başlık satırıyla başlaması veya girdide bazı sütunların gerekmemesi gibi durumlarda istenmeyebilir. Bu satırlar ve alanlar, sırasıyla header ve select_cols argümanları ile kaldırılabilir.
# Creates a dataset that reads all of the records from two CSV files with
# headers, extracting float data from columns 2 and 4.
record_defaults = [999, 999] # Only provide defaults for the selected columns
dataset = tf.data.experimental.CsvDataset("missing.csv", record_defaults, select_cols=[1, 3])
dataset = dataset.map(lambda *items: tf.stack(items))
dataset
<MapDataset element_spec=TensorSpec(shape=(2,), dtype=tf.int32, name=None)>yer tutucu98 l10n-yer
for line in dataset:
  print(line.numpy())
[2 4]
[2 4]
[999   4]
[2 4]
[  2 999]
[999 999]
Dosya kümelerini tüketme
Her dosyanın bir örnek olduğu bir dizi dosya olarak dağıtılan birçok veri kümesi vardır.
flowers_root = tf.keras.utils.get_file(
    'flower_photos',
    'https://storage.googleapis.com/download.tensorflow.org/example_images/flower_photos.tgz',
    untar=True)
flowers_root = pathlib.Path(flowers_root)
Kök dizin, her sınıf için bir dizin içerir:
for item in flowers_root.glob("*"):
  print(item.name)
sunflowers
daisy
LICENSE.txt
roses
tulips
dandelion
Her sınıf dizinindeki dosyalar örneklerdir:
list_ds = tf.data.Dataset.list_files(str(flowers_root/'*/*'))

for f in list_ds.take(5):
  print(f.numpy())
b'/home/kbuilder/.keras/datasets/flower_photos/sunflowers/5018120483_cc0421b176_m.jpg'
b'/home/kbuilder/.keras/datasets/flower_photos/dandelion/8642679391_0805b147cb_m.jpg'
b'/home/kbuilder/.keras/datasets/flower_photos/sunflowers/8266310743_02095e782d_m.jpg'
b'/home/kbuilder/.keras/datasets/flower_photos/tulips/13176521023_4d7cc74856_m.jpg'
b'/home/kbuilder/.keras/datasets/flower_photos/dandelion/19437578578_6ab1b3c984.jpg'
tf.io.read_file işlevini kullanarak verileri okuyun ve (image, label) çiftlerini döndürerek etiketi yoldan çıkarın:
def process_path(file_path):
  label = tf.strings.split(file_path, os.sep)[-2]
  return tf.io.read_file(file_path), label

labeled_ds = list_ds.map(process_path)
for image_raw, label_text in labeled_ds.take(1):
  print(repr(image_raw.numpy()[:100]))
  print()
  print(label_text.numpy())
b'\xff\xd8\xff\xe0\x00\x10JFIF\x00\x01\x01\x00\x00\x01\x00\x01\x00\x00\xff\xe2\x0cXICC_PROFILE\x00\x01\x01\x00\x00\x0cHLino\x02\x10\x00\x00mntrRGB XYZ \x07\xce\x00\x02\x00\t\x00\x06\x001\x00\x00acspMSFT\x00\x00\x00\x00IEC sRGB\x00\x00\x00\x00\x00\x00'

b'daisy'
Veri kümesi öğelerini toplu işleme
Basit gruplama
n en basit biçimi, bir veri kümesinin ardışık öğelerini tek bir öğede yığınlar. Dataset.batch() dönüşümü, öğelerin her bileşenine uygulanan tf.stack() operatörüyle aynı kısıtlamalarla tam olarak bunu yapar: yani, her i bileşeni için, tüm öğelerin tam olarak aynı şekle sahip bir tensöre sahip olması gerekir.
inc_dataset = tf.data.Dataset.range(100)
dec_dataset = tf.data.Dataset.range(0, -100, -1)
dataset = tf.data.Dataset.zip((inc_dataset, dec_dataset))
batched_dataset = dataset.batch(4)

for batch in batched_dataset.take(4):
  print([arr.numpy() for arr in batch])
[array([0, 1, 2, 3]), array([ 0, -1, -2, -3])]
[array([4, 5, 6, 7]), array([-4, -5, -6, -7])]
[array([ 8,  9, 10, 11]), array([ -8,  -9, -10, -11])]
[array([12, 13, 14, 15]), array([-12, -13, -14, -15])]
tf.data şekil bilgilerini yaymaya çalışırken, son toplu iş dolu olmayabileceğinden Dataset.batch varsayılan ayarları bilinmeyen bir toplu iş boyutuna neden olur. Şekildeki None s'ye dikkat edin:
batched_dataset
<BatchDataset element_spec=(TensorSpec(shape=(None,), dtype=tf.int64, name=None), TensorSpec(shape=(None,), dtype=tf.int64, name=None))>
Bu son grubu yok saymak ve tam şekil yayılımını elde etmek için drop_remainder bağımsız değişkenini kullanın:
batched_dataset = dataset.batch(7, drop_remainder=True)
batched_dataset
<BatchDataset element_spec=(TensorSpec(shape=(7,), dtype=tf.int64, name=None), TensorSpec(shape=(7,), dtype=tf.int64, name=None))>
Dolgulu tensörleri harmanlama
Yukarıdaki tarif, tümü aynı boyuta sahip tensörler için çalışır. Bununla birlikte, birçok model (örneğin dizi modelleri), değişen boyutlara sahip olabilen girdi verileriyle çalışır (örneğin, farklı uzunluklardaki diziler). Bu durumu ele almak için, Dataset.padded_batch dönüşümü, dolgulu olabilecekleri bir veya daha fazla boyut belirterek farklı şekillerdeki tensörleri gruplamanıza olanak tanır.
dataset = tf.data.Dataset.range(100)
dataset = dataset.map(lambda x: tf.fill([tf.cast(x, tf.int32)], x))
dataset = dataset.padded_batch(4, padded_shapes=(None,))

for batch in dataset.take(2):
  print(batch.numpy())
  print()
[[0 0 0]
 [1 0 0]
 [2 2 0]
 [3 3 3]]

[[4 4 4 4 0 0 0]
 [5 5 5 5 5 0 0]
 [6 6 6 6 6 6 0]
 [7 7 7 7 7 7 7]]
Dataset.padded_batch dönüşümü, her bileşenin her boyutu için farklı dolgu ayarlamanıza olanak tanır ve değişken uzunluklu (yukarıdaki örnekte None ile gösterilir) veya sabit uzunluklu olabilir. Varsayılan olarak 0 olan dolgu değerini geçersiz kılmak da mümkündür.
Eğitim iş akışları
Birden çok çağın işlenmesi
tf.data API, aynı verinin birden çok dönemini işlemek için iki ana yol sunar.
Birden çok çağda bir veri kümesi üzerinde yineleme yapmanın en basit yolu Dataset.repeat() dönüşümünü kullanmaktır. İlk olarak, bir titanik veri veri kümesi oluşturun:
titanic_file = tf.keras.utils.get_file("train.csv", "https://storage.googleapis.com/tf-datasets/titanic/train.csv")
titanic_lines = tf.data.TextLineDataset(titanic_file)
def plot_batch_sizes(ds):
  batch_sizes = [batch.shape[0] for batch in ds]
  plt.bar(range(len(batch_sizes)), batch_sizes)
  plt.xlabel('Batch number')
  plt.ylabel('Batch size')
Dataset.repeat() dönüşümünün bağımsız değişken olmadan uygulanması, girişi süresiz olarak yineleyecektir.
Dataset.repeat dönüşümü, argümanlarını bir çağın sonunu ve bir sonraki çağın başlangıcını bildirmeden birleştirir. Bu nedenle, Dataset.repeat sonra uygulanan bir Dataset.batch , çağ sınırlarını aşan yığınlar verecektir:
titanic_batches = titanic_lines.repeat(3).batch(128)
plot_batch_sizes(titanic_batches)
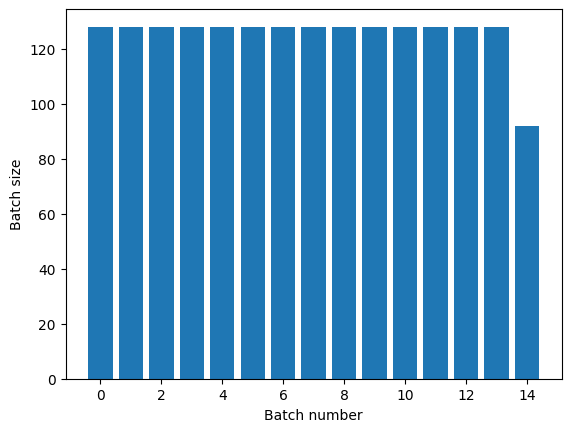
Net dönem ayrımına ihtiyacınız varsa, Dataset.batch önce koyun:
titanic_batches = titanic_lines.batch(128).repeat(3)

plot_batch_sizes(titanic_batches)

Her dönemin sonunda özel bir hesaplama yapmak (örneğin istatistik toplamak için) yapmak istiyorsanız, o zaman en basit olanı her bir dönemde veri kümesi yinelemesini yeniden başlatmaktır:
epochs = 3
dataset = titanic_lines.batch(128)

for epoch in range(epochs):
  for batch in dataset:
    print(batch.shape)
  print("End of epoch: ", epoch)
(128,)
(128,)
(128,)
(128,)
(116,)
End of epoch:  0
(128,)
(128,)
(128,)
(128,)
(116,)
End of epoch:  1
(128,)
(128,)
(128,)
(128,)
(116,)
End of epoch:  2
Rastgele karıştırılan giriş verileri
Dataset.shuffle() dönüşümü, sabit boyutlu bir arabellek tutar ve sonraki öğeyi bu arabellekten rastgele rastgele seçer.
Etkiyi görebilmeniz için veri kümesine bir dizin ekleyin:
lines = tf.data.TextLineDataset(titanic_file)
counter = tf.data.experimental.Counter()

dataset = tf.data.Dataset.zip((counter, lines))
dataset = dataset.shuffle(buffer_size=100)
dataset = dataset.batch(20)
dataset
<BatchDataset element_spec=(TensorSpec(shape=(None,), dtype=tf.int64, name=None), TensorSpec(shape=(None,), dtype=tf.string, name=None))>
buffer_size 100 ve parti büyüklüğü 20 olduğundan, ilk parti, indeksi 120'nin üzerinde olan hiçbir öğe içermiyor.
n,line_batch = next(iter(dataset))
print(n.numpy())
[ 52  94  22  70  63  96  56 102  38  16  27 104  89  43  41  68  42  61
 112   8]
Dataset.batch'de olduğu gibi, Dataset.batch göre Dataset.repeat önemlidir.
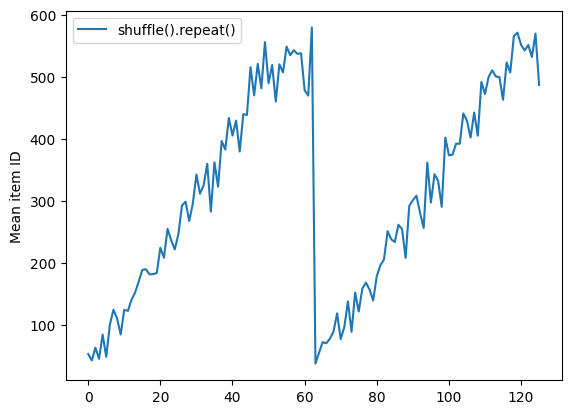
Dataset.shuffle , karıştırma arabelleği boşalana kadar bir çağın sonunu bildirmez. Bu nedenle, bir tekrardan önce yerleştirilen bir karıştırma, bir sonrakine geçmeden önce bir dönemin her öğesini gösterecektir:
dataset = tf.data.Dataset.zip((counter, lines))
shuffled = dataset.shuffle(buffer_size=100).batch(10).repeat(2)

print("Here are the item ID's near the epoch boundary:\n")
for n, line_batch in shuffled.skip(60).take(5):
  print(n.numpy())
Here are the item ID's near the epoch boundary:

[509 595 537 550 555 591 480 627 482 519]
[522 619 538 581 569 608 531 558 461 496]
[548 489 379 607 611 622 234 525]
[ 59  38   4  90  73  84  27  51 107  12]
[77 72 91 60  7 62 92 47 70 67]
yer tutucu128 l10n-yer
shuffle_repeat = [n.numpy().mean() for n, line_batch in shuffled]
plt.plot(shuffle_repeat, label="shuffle().repeat()")
plt.ylabel("Mean item ID")
plt.legend()
<matplotlib.legend.Legend at 0x7f7e7061c650>
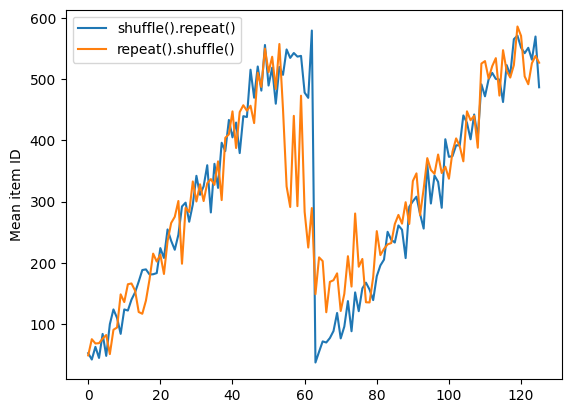
Ancak bir karıştırmadan önceki tekrar, çağ sınırlarını birbirine karıştırır:
dataset = tf.data.Dataset.zip((counter, lines))
shuffled = dataset.repeat(2).shuffle(buffer_size=100).batch(10)

print("Here are the item ID's near the epoch boundary:\n")
for n, line_batch in shuffled.skip(55).take(15):
  print(n.numpy())
Here are the item ID's near the epoch boundary:

[  6   8 528 604  13 492 308 441 569 475]
[  5 626 615 568  20 554 520 454  10 607]
[510 542   0 363  32 446 395 588  35   4]
[  7  15  28  23  39 559 585  49 252 556]
[581 617  25  43  26 548  29 460  48  41]
[ 19  64  24 300 612 611  36  63  69  57]
[287 605  21 512 442  33  50  68 608  47]
[625  90  91 613  67  53 606 344  16  44]
[453 448  89  45 465   2  31 618 368 105]
[565   3 586 114  37 464  12 627  30 621]
[ 82 117  72  75  84  17 571 610  18 600]
[107 597 575  88 623  86 101  81 456 102]
[122  79  51  58  80  61 367  38 537 113]
[ 71  78 598 152 143 620 100 158 133 130]
[155 151 144 135 146 121  83  27 103 134]
yer tutucu132 l10n-yer
repeat_shuffle = [n.numpy().mean() for n, line_batch in shuffled]

plt.plot(shuffle_repeat, label="shuffle().repeat()")
plt.plot(repeat_shuffle, label="repeat().shuffle()")
plt.ylabel("Mean item ID")
plt.legend()
<matplotlib.legend.Legend at 0x7f7e706013d0>
Ön işleme verileri
Dataset.map(f) dönüşümü, girdi veri kümesinin her bir öğesine belirli bir f işlevi uygulayarak yeni bir veri kümesi üretir. İşlevsel programlama dillerinde listelere (ve diğer yapılara) yaygın olarak uygulanan map() işlevine dayanır. f işlevi, girişte tek bir öğeyi temsil eden tf.Tensor nesnelerini alır ve yeni veri kümesinde tek bir öğeyi temsil edecek tf.Tensor nesnelerini döndürür. Uygulaması, bir öğeyi diğerine dönüştürmek için standart TensorFlow işlemlerini kullanır.
Bu bölüm, Dataset.map() 'in nasıl kullanılacağına ilişkin yaygın örnekleri kapsar.
Görüntü verilerinin kodunu çözme ve yeniden boyutlandırma
Gerçek dünya görüntü verileri üzerinde bir sinir ağını eğitirken, genellikle farklı boyutlardaki görüntüleri ortak bir boyuta dönüştürmek gerekir, böylece bunlar sabit bir boyuta toplu hale getirilebilir.
Çiçek dosya adları veri kümesini yeniden oluşturun:
list_ds = tf.data.Dataset.list_files(str(flowers_root/'*/*'))
Veri kümesi öğelerini işleyen bir işlev yazın.
# Reads an image from a file, decodes it into a dense tensor, and resizes it
# to a fixed shape.
def parse_image(filename):
  parts = tf.strings.split(filename, os.sep)
  label = parts[-2]

  image = tf.io.read_file(filename)
  image = tf.io.decode_jpeg(image)
  image = tf.image.convert_image_dtype(image, tf.float32)
  image = tf.image.resize(image, [128, 128])
  return image, label
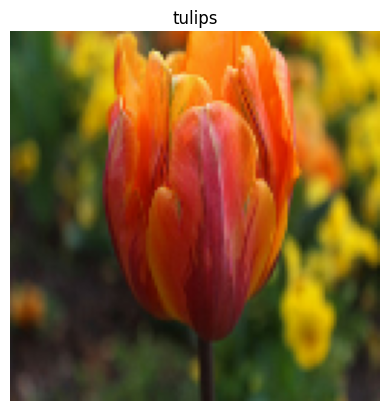
Çalıştığını test edin.
file_path = next(iter(list_ds))
image, label = parse_image(file_path)

def show(image, label):
  plt.figure()
  plt.imshow(image)
  plt.title(label.numpy().decode('utf-8'))
  plt.axis('off')

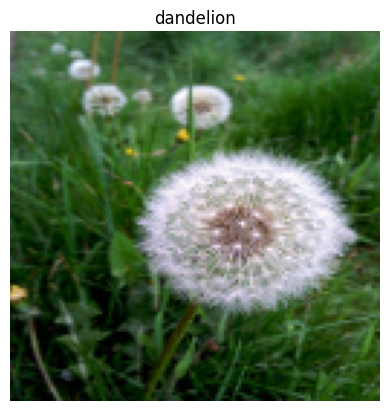
show(image, label)
Veri kümesi üzerinde eşleyin.
images_ds = list_ds.map(parse_image)

for image, label in images_ds.take(2):
  show(image, label)

Keyfi Python mantığını uygulama
Performans nedenleriyle, mümkün olduğunda verilerinizi önceden işlemek için TensorFlow işlemlerini kullanın. Ancak, girdi verilerinizi ayrıştırırken bazen harici Python kitaplıklarını çağırmak yararlıdır. Bir Dataset.map() dönüşümünde tf.py_function() işlemini kullanabilirsiniz.
Örneğin, rastgele bir döndürme uygulamak istiyorsanız, tf.image modülünde yalnızca tf.image.rot90 ve bu, görüntü büyütme için pek kullanışlı değildir.
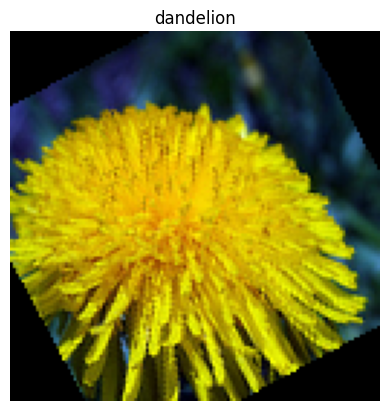
tf.py_function göstermek için bunun yerine scipy.ndimage.rotate işlevini kullanmayı deneyin:
import scipy.ndimage as ndimage

def random_rotate_image(image):
  image = ndimage.rotate(image, np.random.uniform(-30, 30), reshape=False)
  return image
image, label = next(iter(images_ds))
image = random_rotate_image(image)
show(image, label)
Clipping input data to the valid range for imshow with RGB data ([0..1] for floats or [0..255] for integers).
Bu işlevi Dataset.from_generator ile kullanmak için Dataset.map ile aynı uyarılar geçerlidir, işlevi uyguladığınızda dönüş şekillerini ve türlerini tanımlamanız gerekir:
def tf_random_rotate_image(image, label):
  im_shape = image.shape
  [image,] = tf.py_function(random_rotate_image, [image], [tf.float32])
  image.set_shape(im_shape)
  return image, label
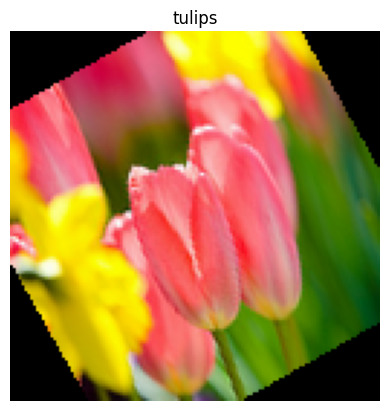
rot_ds = images_ds.map(tf_random_rotate_image)

for image, label in rot_ds.take(2):
  show(image, label)
Clipping input data to the valid range for imshow with RGB data ([0..1] for floats or [0..255] for integers).
Clipping input data to the valid range for imshow with RGB data ([0..1] for floats or [0..255] for integers).

tf.Example protokol arabelleği mesajlarını ayrıştırma
Birçok girdi işlem hattı, bir TFRecord biçiminden tf.train.Example protokol arabelleği mesajlarını çıkarır. Her tf.train.Example kaydı bir veya daha fazla "özellik" içerir ve giriş hattı genellikle bu özellikleri tensörlere dönüştürür.
fsns_test_file = tf.keras.utils.get_file("fsns.tfrec", "https://storage.googleapis.com/download.tensorflow.org/data/fsns-20160927/testdata/fsns-00000-of-00001")
dataset = tf.data.TFRecordDataset(filenames = [fsns_test_file])
dataset
<TFRecordDatasetV2 element_spec=TensorSpec(shape=(), dtype=tf.string, name=None)>
Verileri anlamak için bir tf.data.Dataset dışında tf.train.Example protos ile çalışabilirsiniz:
raw_example = next(iter(dataset))
parsed = tf.train.Example.FromString(raw_example.numpy())

feature = parsed.features.feature
raw_img = feature['image/encoded'].bytes_list.value[0]
img = tf.image.decode_png(raw_img)
plt.imshow(img)
plt.axis('off')
_ = plt.title(feature["image/text"].bytes_list.value[0])

raw_example = next(iter(dataset))
def tf_parse(eg):
  example = tf.io.parse_example(
      eg[tf.newaxis], {
          'image/encoded': tf.io.FixedLenFeature(shape=(), dtype=tf.string),
          'image/text': tf.io.FixedLenFeature(shape=(), dtype=tf.string)
      })
  return example['image/encoded'][0], example['image/text'][0]
img, txt = tf_parse(raw_example)
print(txt.numpy())
print(repr(img.numpy()[:20]), "...")
b'Rue Perreyon'
b'\x89PNG\r\n\x1a\n\x00\x00\x00\rIHDR\x00\x00\x02X' ...
decoded = dataset.map(tf_parse)
decoded
<MapDataset element_spec=(TensorSpec(shape=(), dtype=tf.string, name=None), TensorSpec(shape=(), dtype=tf.string, name=None))>
image_batch, text_batch = next(iter(decoded.batch(10)))
image_batch.shape
TensorShape([10])
Zaman serisi pencereleme
Bir uçtan uca zaman serisi örneği için bkz.: Zaman serisi tahmini .
Zaman serisi verileri genellikle zaman ekseni bozulmadan düzenlenir.
Aşağıdakileri göstermek için basit bir Dataset.range kullanın:
range_ds = tf.data.Dataset.range(100000)
Tipik olarak, bu tür verilere dayanan modeller, bitişik bir zaman dilimi isteyecektir.
En basit yaklaşım, verileri toplu hale getirmek olacaktır:
batch kullanma
batches = range_ds.batch(10, drop_remainder=True)

for batch in batches.take(5):
  print(batch.numpy())
[0 1 2 3 4 5 6 7 8 9]
[10 11 12 13 14 15 16 17 18 19]
[20 21 22 23 24 25 26 27 28 29]
[30 31 32 33 34 35 36 37 38 39]
[40 41 42 43 44 45 46 47 48 49]
Veya geleceğe yönelik bir adım yoğun tahminler yapmak için özellikleri ve etiketleri birbirine göre bir adım kaydırabilirsiniz:
def dense_1_step(batch):
  # Shift features and labels one step relative to each other.
  return batch[:-1], batch[1:]

predict_dense_1_step = batches.map(dense_1_step)

for features, label in predict_dense_1_step.take(3):
  print(features.numpy(), " => ", label.numpy())
[0 1 2 3 4 5 6 7 8]  =>  [1 2 3 4 5 6 7 8 9]
[10 11 12 13 14 15 16 17 18]  =>  [11 12 13 14 15 16 17 18 19]
[20 21 22 23 24 25 26 27 28]  =>  [21 22 23 24 25 26 27 28 29]
Sabit bir ofset yerine bütün bir pencereyi tahmin etmek için partileri iki parçaya bölebilirsiniz:
batches = range_ds.batch(15, drop_remainder=True)

def label_next_5_steps(batch):
  return (batch[:-5],   # Inputs: All except the last 5 steps
          batch[-5:])   # Labels: The last 5 steps

predict_5_steps = batches.map(label_next_5_steps)

for features, label in predict_5_steps.take(3):
  print(features.numpy(), " => ", label.numpy())
[0 1 2 3 4 5 6 7 8 9]  =>  [10 11 12 13 14]
[15 16 17 18 19 20 21 22 23 24]  =>  [25 26 27 28 29]
[30 31 32 33 34 35 36 37 38 39]  =>  [40 41 42 43 44]
Bir grubun özellikleri ile diğerinin etiketleri arasında bir miktar örtüşmeye izin vermek için Dataset.zip kullanın:
feature_length = 10
label_length = 3

features = range_ds.batch(feature_length, drop_remainder=True)
labels = range_ds.batch(feature_length).skip(1).map(lambda labels: labels[:label_length])

predicted_steps = tf.data.Dataset.zip((features, labels))

for features, label in predicted_steps.take(5):
  print(features.numpy(), " => ", label.numpy())
[0 1 2 3 4 5 6 7 8 9]  =>  [10 11 12]
[10 11 12 13 14 15 16 17 18 19]  =>  [20 21 22]
[20 21 22 23 24 25 26 27 28 29]  =>  [30 31 32]
[30 31 32 33 34 35 36 37 38 39]  =>  [40 41 42]
[40 41 42 43 44 45 46 47 48 49]  =>  [50 51 52]
window kullanma
Dataset.batch kullanırken daha hassas kontrole ihtiyaç duyabileceğiniz durumlar olabilir. Dataset.window yöntemi size tam kontrol sağlar, ancak biraz dikkat gerektirir: bir Dataset of Datasets döndürür. Ayrıntılar için Veri kümesi yapısına bakın.
window_size = 5

windows = range_ds.window(window_size, shift=1)
for sub_ds in windows.take(5):
  print(sub_ds)
<_VariantDataset element_spec=TensorSpec(shape=(), dtype=tf.int64, name=None)>
<_VariantDataset element_spec=TensorSpec(shape=(), dtype=tf.int64, name=None)>
<_VariantDataset element_spec=TensorSpec(shape=(), dtype=tf.int64, name=None)>
<_VariantDataset element_spec=TensorSpec(shape=(), dtype=tf.int64, name=None)>
<_VariantDataset element_spec=TensorSpec(shape=(), dtype=tf.int64, name=None)>
Dataset.flat_map yöntemi, bir veri kümesi veri kümesini alabilir ve onu tek bir veri kümesine düzleştirebilir:
for x in windows.flat_map(lambda x: x).take(30):
   print(x.numpy(), end=' ')
0 1 2 3 4 1 2 3 4 5 2 3 4 5 6 3 4 5 6 7 4 5 6 7 8 5 6 7 8 9
Hemen hemen tüm durumlarda, önce veri kümesini .batch yapmak isteyeceksiniz:
def sub_to_batch(sub):
  return sub.batch(window_size, drop_remainder=True)

for example in windows.flat_map(sub_to_batch).take(5):
  print(example.numpy())
[0 1 2 3 4]
[1 2 3 4 5]
[2 3 4 5 6]
[3 4 5 6 7]
[4 5 6 7 8]
Şimdi, shift argümanının her bir pencerenin ne kadar hareket ettiğini kontrol ettiğini görebilirsiniz.
Bunu bir araya getirerek bu işlevi yazabilirsiniz:
def make_window_dataset(ds, window_size=5, shift=1, stride=1):
  windows = ds.window(window_size, shift=shift, stride=stride)

  def sub_to_batch(sub):
    return sub.batch(window_size, drop_remainder=True)

  windows = windows.flat_map(sub_to_batch)
  return windows
ds = make_window_dataset(range_ds, window_size=10, shift = 5, stride=3)

for example in ds.take(10):
  print(example.numpy())
[ 0  3  6  9 12 15 18 21 24 27]
[ 5  8 11 14 17 20 23 26 29 32]
[10 13 16 19 22 25 28 31 34 37]
[15 18 21 24 27 30 33 36 39 42]
[20 23 26 29 32 35 38 41 44 47]
[25 28 31 34 37 40 43 46 49 52]
[30 33 36 39 42 45 48 51 54 57]
[35 38 41 44 47 50 53 56 59 62]
[40 43 46 49 52 55 58 61 64 67]
[45 48 51 54 57 60 63 66 69 72]
Ardından, daha önce olduğu gibi etiketleri çıkarmak kolaydır:
dense_labels_ds = ds.map(dense_1_step)

for inputs,labels in dense_labels_ds.take(3):
  print(inputs.numpy(), "=>", labels.numpy())
[ 0  3  6  9 12 15 18 21 24] => [ 3  6  9 12 15 18 21 24 27]
[ 5  8 11 14 17 20 23 26 29] => [ 8 11 14 17 20 23 26 29 32]
[10 13 16 19 22 25 28 31 34] => [13 16 19 22 25 28 31 34 37]
yeniden örnekleme
Sınıf açısından çok dengesiz bir veri kümesiyle çalışırken, veri kümesini yeniden örneklemek isteyebilirsiniz. tf.data bunu yapmak için iki yöntem sunar. Kredi kartı dolandırıcılığı veri seti, bu tür bir soruna iyi bir örnektir.
zip_path = tf.keras.utils.get_file(
    origin='https://storage.googleapis.com/download.tensorflow.org/data/creditcard.zip',
    fname='creditcard.zip',
    extract=True)

csv_path = zip_path.replace('.zip', '.csv')
Downloading data from https://storage.googleapis.com/download.tensorflow.org/data/creditcard.zip
69156864/69155632 [==============================] - 2s 0us/step
69165056/69155632 [==============================] - 2s 0us/step
-yer tutucu177 l10n-yer
creditcard_ds = tf.data.experimental.make_csv_dataset(
    csv_path, batch_size=1024, label_name="Class",
    # Set the column types: 30 floats and an int.
    column_defaults=[float()]*30+[int()])
Şimdi, sınıfların dağılımını kontrol edin, oldukça çarpık:
def count(counts, batch):
  features, labels = batch
  class_1 = labels == 1
  class_1 = tf.cast(class_1, tf.int32)

  class_0 = labels == 0
  class_0 = tf.cast(class_0, tf.int32)

  counts['class_0'] += tf.reduce_sum(class_0)
  counts['class_1'] += tf.reduce_sum(class_1)

  return counts
counts = creditcard_ds.take(10).reduce(
    initial_state={'class_0': 0, 'class_1': 0},
    reduce_func = count)

counts = np.array([counts['class_0'].numpy(),
                   counts['class_1'].numpy()]).astype(np.float32)

fractions = counts/counts.sum()
print(fractions)
[0.9956 0.0044]
Dengesiz bir veri kümesiyle eğitime yönelik yaygın bir yaklaşım, onu dengelemektir. tf.data , bu iş akışını sağlayan birkaç yöntem içerir:
Veri kümeleri örneklemesi
Bir veri kümesini yeniden örneklemeye yönelik bir yaklaşım, sample_from_datasets kullanmaktır. Bu, her sınıf için ayrı bir data.Dataset olduğunda daha uygulanabilir.
Burada, onları kredi kartı dolandırıcılık verilerinden oluşturmak için filtreyi kullanın:
negative_ds = (
  creditcard_ds
    .unbatch()
    .filter(lambda features, label: label==0)
    .repeat())
positive_ds = (
  creditcard_ds
    .unbatch()
    .filter(lambda features, label: label==1)
    .repeat())
for features, label in positive_ds.batch(10).take(1):
  print(label.numpy())
[1 1 1 1 1 1 1 1 1 1]
tf.data.Dataset.sample_from_datasets kullanmak için veri kümelerini ve her birinin ağırlığını iletin:
balanced_ds = tf.data.Dataset.sample_from_datasets(
    [negative_ds, positive_ds], [0.5, 0.5]).batch(10)
Şimdi veri kümesi, her bir sınıfın 50/50 olasılıkla örneklerini üretir:
for features, labels in balanced_ds.take(10):
  print(labels.numpy())
[1 0 1 0 1 0 1 1 1 1]
[0 0 1 1 0 1 1 1 1 1]
[1 1 1 1 0 0 1 0 1 0]
[1 1 1 0 1 0 0 1 1 1]
[0 1 0 1 1 1 0 1 1 0]
[0 1 0 0 0 1 0 0 0 0]
[1 1 1 1 1 0 0 1 1 0]
[0 0 0 1 0 1 1 1 0 0]
[0 0 1 1 1 1 0 1 1 1]
[1 0 0 1 1 1 1 0 1 1]
Reddetme yeniden örnekleme
Yukarıdaki Dataset.sample_from_datasets yaklaşımıyla ilgili bir sorun, sınıf başına ayrı bir tf.data.Dataset ihtiyaç duymasıdır. Bu iki veri kümesini oluşturmak için Dataset.filter kullanabilirsiniz, ancak bu, tüm verilerin iki kez yüklenmesine neden olur.
data.Dataset.rejection_resample yöntemi, yalnızca bir kez yüklenirken yeniden dengelemek için bir veri kümesine uygulanabilir. Dengeyi sağlamak için öğeler veri kümesinden çıkarılacaktır.
data.Dataset.rejection_resample bir class_func argümanı alır. Bu class_func , her veri kümesi öğesine uygulanır ve dengeleme amacıyla bir örneğin hangi sınıfa ait olduğunu belirlemek için kullanılır.
Buradaki amaç, etikel dağılımını dengelemektir ve creditcard_ds öğeleri zaten (features, label) çiftleridir. Bu yüzden class_func sadece şu etiketleri döndürmesi gerekiyor:
def class_func(features, label):
  return label
Yeniden örnekleme yöntemi, tek tek örneklerle ilgilenir, bu nedenle bu durumda, bu yöntemi uygulamadan önce veri kümesini unbatch gerekir.
Yöntem, girdi olarak bir hedef dağılıma ve isteğe bağlı olarak bir ilk dağılım tahminine ihtiyaç duyar.
resample_ds = (
    creditcard_ds
    .unbatch()
    .rejection_resample(class_func, target_dist=[0.5,0.5],
                        initial_dist=fractions)
    .batch(10))
WARNING:tensorflow:From /tmpfs/src/tf_docs_env/lib/python3.7/site-packages/tensorflow/python/data/ops/dataset_ops.py:5797: Print (from tensorflow.python.ops.logging_ops) is deprecated and will be removed after 2018-08-20.
Instructions for updating:
Use tf.print instead of tf.Print. Note that tf.print returns a no-output operator that directly prints the output. Outside of defuns or eager mode, this operator will not be executed unless it is directly specified in session.run or used as a control dependency for other operators. This is only a concern in graph mode. Below is an example of how to ensure tf.print executes in graph mode:
rejection_resample yöntemi, class class_func çıktısı olduğu (class, example) çiftleri döndürür. Bu durumda, example zaten bir (feature, label) çiftiydi, bu nedenle etiketlerin fazladan kopyasını bırakmak için map kullanın:
balanced_ds = resample_ds.map(lambda extra_label, features_and_label: features_and_label)
Şimdi veri kümesi, her bir sınıfın 50/50 olasılıkla örneklerini üretir:
for features, labels in balanced_ds.take(10):
  print(labels.numpy())
Proportion of examples rejected by sampler is high: [0.995605469][0.995605469 0.00439453125][0 1]
Proportion of examples rejected by sampler is high: [0.995605469][0.995605469 0.00439453125][0 1]
Proportion of examples rejected by sampler is high: [0.995605469][0.995605469 0.00439453125][0 1]
Proportion of examples rejected by sampler is high: [0.995605469][0.995605469 0.00439453125][0 1]
Proportion of examples rejected by sampler is high: [0.995605469][0.995605469 0.00439453125][0 1]
Proportion of examples rejected by sampler is high: [0.995605469][0.995605469 0.00439453125][0 1]
Proportion of examples rejected by sampler is high: [0.995605469][0.995605469 0.00439453125][0 1]
Proportion of examples rejected by sampler is high: [0.995605469][0.995605469 0.00439453125][0 1]
Proportion of examples rejected by sampler is high: [0.995605469][0.995605469 0.00439453125][0 1]
Proportion of examples rejected by sampler is high: [0.995605469][0.995605469 0.00439453125][0 1]
[0 1 1 1 0 1 1 0 1 1]
[1 1 0 1 0 0 0 0 1 1]
[1 1 1 1 0 0 0 0 1 1]
[1 0 0 1 0 0 1 0 1 1]
[1 0 0 0 0 1 0 0 0 0]
[1 0 0 1 1 0 1 1 1 0]
[1 1 0 0 0 0 0 0 0 1]
[0 0 1 0 0 0 1 0 1 1]
[0 1 0 1 0 1 0 0 0 1]
[0 0 0 0 0 0 0 0 1 1]
Yineleyici Kontrol Noktası
Tensorflow, eğitim süreciniz yeniden başladığında ilerlemenin çoğunu kurtarmak için en son kontrol noktasını geri yükleyebilmesi için kontrol noktaları almayı destekler. Model değişkenlerini denetlemeye ek olarak, veri kümesi yineleyicisinin ilerlemesini de kontrol edebilirsiniz. Bu, büyük bir veri kümeniz varsa ve her yeniden başlatmada veri kümesini baştan başlatmak istemiyorsanız yararlı olabilir. Ancak yineleyici denetim noktalarının büyük olabileceğini unutmayın, çünkü shuffle ve prefetch gibi dönüşümler yineleyici içinde arabelleğe alma öğeleri gerektirir.
Yineleyicinizi bir kontrol noktasına dahil etmek için yineleyiciyi tf.train.Checkpoint oluşturucusuna iletin.
range_ds = tf.data.Dataset.range(20)

iterator = iter(range_ds)
ckpt = tf.train.Checkpoint(step=tf.Variable(0), iterator=iterator)
manager = tf.train.CheckpointManager(ckpt, '/tmp/my_ckpt', max_to_keep=3)

print([next(iterator).numpy() for _ in range(5)])

save_path = manager.save()

print([next(iterator).numpy() for _ in range(5)])

ckpt.restore(manager.latest_checkpoint)

print([next(iterator).numpy() for _ in range(5)])
[0, 1, 2, 3, 4]
[5, 6, 7, 8, 9]
[5, 6, 7, 8, 9]
tf.keras ile tf.data kullanma
tf.keras API, makine öğrenimi modelleri oluşturmanın ve yürütmenin birçok yönünü basitleştirir. .fit() ve .evaluate() ve .predict() API'leri, girdi olarak veri kümelerini destekler. İşte hızlı bir veri seti ve model kurulumu:
train, test = tf.keras.datasets.fashion_mnist.load_data()

images, labels = train
images = images/255.0
labels = labels.astype(np.int32)
fmnist_train_ds = tf.data.Dataset.from_tensor_slices((images, labels))
fmnist_train_ds = fmnist_train_ds.shuffle(5000).batch(32)

model = tf.keras.Sequential([
  tf.keras.layers.Flatten(),
  tf.keras.layers.Dense(10)
])

model.compile(optimizer='adam',
              loss=tf.keras.losses.SparseCategoricalCrossentropy(from_logits=True),
              metrics=['accuracy'])
Model.fit ve Model.evaluate için (feature, label) çiftlerinden oluşan bir veri kümesini iletmek yeterlidir:
model.fit(fmnist_train_ds, epochs=2)
Epoch 1/2
1875/1875 [==============================] - 4s 2ms/step - loss: 0.5984 - accuracy: 0.7973
Epoch 2/2
1875/1875 [==============================] - 4s 2ms/step - loss: 0.4607 - accuracy: 0.8430
<keras.callbacks.History at 0x7f7e70283110>
Örneğin, Dataset.repeat() çağırarak sonsuz bir veri kümesi iletirseniz, yalnızcastep_per_epoch bağımsız değişkenini de steps_per_epoch gerekir:
model.fit(fmnist_train_ds.repeat(), epochs=2, steps_per_epoch=20)
Epoch 1/2
20/20 [==============================] - 0s 2ms/step - loss: 0.4574 - accuracy: 0.8672
Epoch 2/2
20/20 [==============================] - 0s 2ms/step - loss: 0.4216 - accuracy: 0.8562
<keras.callbacks.History at 0x7f7e144948d0>
Değerlendirme için değerlendirme adımlarının sayısını geçebilirsiniz:
loss, accuracy = model.evaluate(fmnist_train_ds)
print("Loss :", loss)
print("Accuracy :", accuracy)
1875/1875 [==============================] - 4s 2ms/step - loss: 0.4350 - accuracy: 0.8524
Loss : 0.4350026249885559
Accuracy : 0.8524333238601685
Uzun veri kümeleri için değerlendirilecek adım sayısını ayarlayın:
loss, accuracy = model.evaluate(fmnist_train_ds.repeat(), steps=10)
print("Loss :", loss)
print("Accuracy :", accuracy)
10/10 [==============================] - 0s 2ms/step - loss: 0.4345 - accuracy: 0.8687
Loss : 0.43447819352149963
Accuracy : 0.8687499761581421
Model.predict etiketler gerekli değildir.
predict_ds = tf.data.Dataset.from_tensor_slices(images).batch(32)
result = model.predict(predict_ds, steps = 10)
print(result.shape)
(320, 10)
Ancak, bunları içeren bir veri kümesi iletirseniz, etiketler yoksayılır:
result = model.predict(fmnist_train_ds, steps = 10)
print(result.shape)
(320, 10)

